How to Create an Appointment in Linkedcare
Step 1: Open LinkedCare
Visit web.linkedcare.com in your web browser.
Step 2: Log in to Your Account
Sign in using your Doctor or Assistant credentials. You can log in using either of the following methods:
- Mobile Number + OTP
- Mobile Number + Password
Step 3: Open the Appointment Section
After logging in, navigate to the Appointment section and click the Set Appointment button.
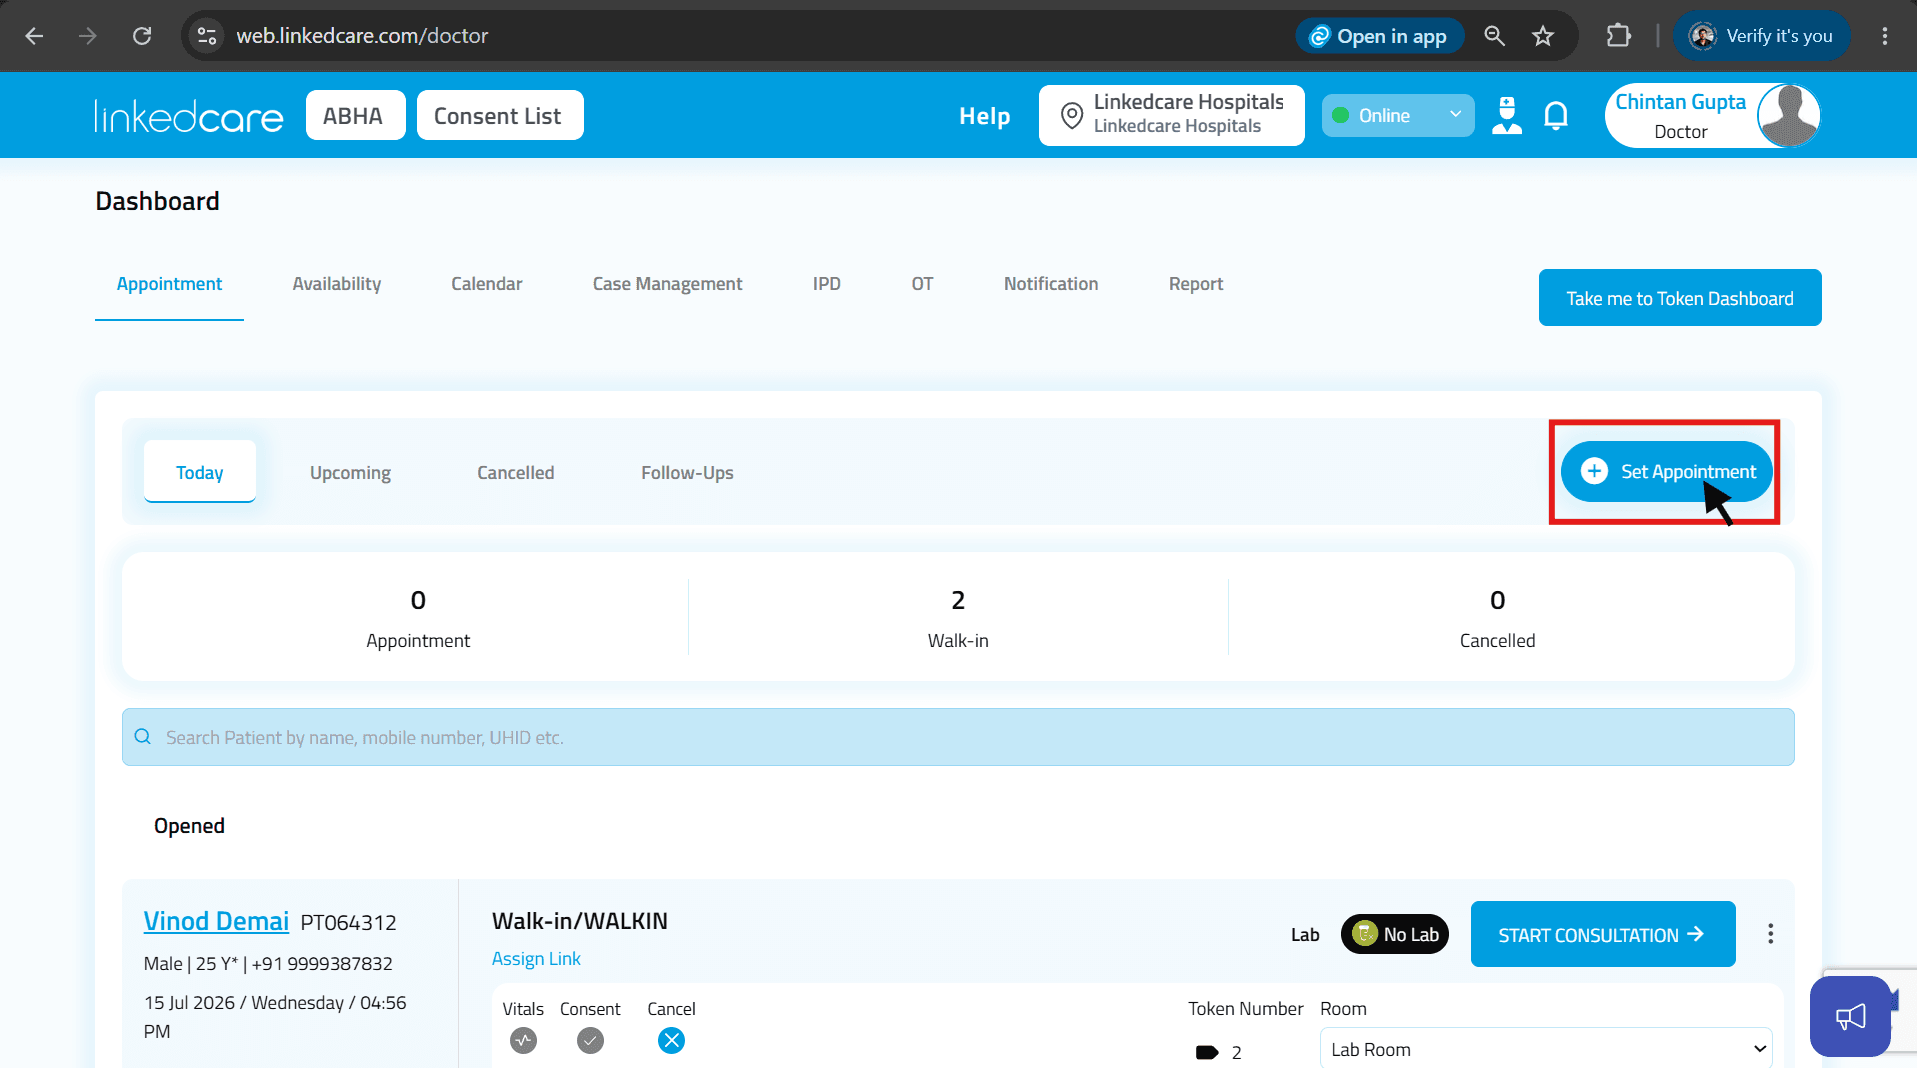Step 4: Choose a Patient Registration Method
You can create an appointment using any of the following methods:
Option 1: HIMS
- Enter the patient's Mobile Number.
- If the patient already exists, select the patient and continue creating the appointment.
- If the patient is new, create a new patient profile first, then proceed with the appointment.
Option 2: ABHA
- Enter the patient's Aadhaar-linked Mobile Number, ABHA Number, or Aadhaar Number.
- An OTP will be sent to the patient's registered mobile number.
- The OTP remains valid for 24 hours.
- Verify the OTP and continue creating the appointment.
Option 3: Scan ABHA QR Code
- Scan the patient's ABHA QR Code to fetch the patient details automatically.
- Continue with the appointment.
Step 5: Select Appointment Details
After selecting or creating the patient, choose the Appointment Details Type:
Option 1: Walk-in
Select Walk-in if the patient is visiting the hospital immediately.
Provide the following details:
- Reason for Visit
- Room
- Appointment Type
- Walk-in
- Video Consultation
- Home Visit
Click Save to create the appointment.
Option 2: Advance Appointment
Select Appointment from the Appointment Details Type.
- Select the Appointment Date.
- Enter the From and To time.
- Select the Clinic Location.
- Enter the Reason for the appointment.
- Select the Appointment Type:
- Clinic
- Home
- Video
Click Save. The appointment will be created and displayed in the Upcoming Appointments section.
Option 3: Emergency
Select Emergency from the Appointment Details Type.
- Enter the patient's Contact Number.
- Enter the Emergency Contact Number.
Click Save to create the emergency appointment.
Step 6: Assign a Doctor
Select the doctor to whom the appointment will be assigned.
Success
Your appointment has been created successfully.